
Canva is an excellent graphic design tool for bloggers and entrepreneurs; because it helps enhance their visual digital presence by assisting them in creating and adding stunning graphics to their websites and social media platforms. In this Canva for Beginners Walk Through Guide, I will introduce you to all the basic and advanced features of Canva with a demonstration of how they work.
The best thing about this tool is that it is extremely simple and easy to use. It is most probably the most straightforward web tool you will use in your life.
Before I start, you must understand that in this era…
Canva Has Become A Need
If you think about all the things one can do with this tool, starting from the simple stuff like cropping or flipping a picture to creating digital video commercials that you can share on your business Facebook page, Instagram, or any other forum.
Whether you are a blogger or run a small business you need visuals; such as images, infographics, or videos to get your message across in a much better way.
Sharing images on social media can seriously boost your brand exposure. And, illustrations inserted within a blog post will add value and engage your readers better.
This guide is for bloggers and business owners alike who want to enhance their visual presence by creating and sharing enticing images on their websites and social platforms.
What makes Canva so Special?
Canva is special because it is super easy to use and work with. In fact, this visual design web and phone applications are so easy that with it anyone can be a graphic designer; within minutes.
With Canva, as an entrepreneur or a blogger, you can quickly convert ordinary photos into fabulous visual content with your logo on it.
You can even add your logo to the videos you create on Canva for your website and social media.
What makes Canva so Easy?
Thousands of professionally designed templates found inside the Canva digital library make designing with Canva as easy as taking a stroll in the park.
These templates are arranged into different categories that literally cover all uses and purposes.
Just select the one template that suits your need and edit it however you want; every template is 100% customizable.
With this one tool, you can overcome all of your design challenges and can always have great visuals to boost your brand.
The uses of Canva: What can I design with Canva?
The question here should be, “what can you NOT design with Canva?” From simple logos and stationery to a whole website; can be designed with this tool.
Here’s a small list to give you an idea.
- Presentations
- Posters
- Wallpapers
- Infographics
- Brochures
- Certificates
- Labels and Invoices
- Planners and Banners
- Newsletters
- Website Landing Pages
- E−Books and Magazine covers
- Calendars
- T−shirts and Mugs
- Flyers
- Photo Collages
With some basic aesthetics and mouse clicks, anyone can create great graphics on Canva.
Canva for Social Media
If you run a Facebook page then you can use Canva to create Facebook banners, short snappy videos, stories, Ad campaigns, and even graphic design backdrops for your pages, groups, or Facebook shops.
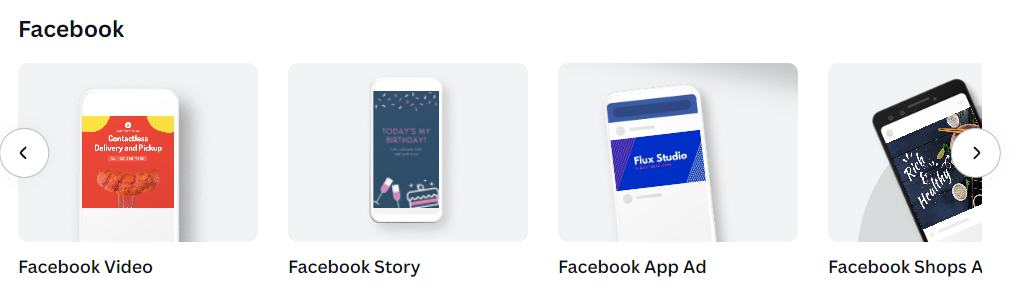
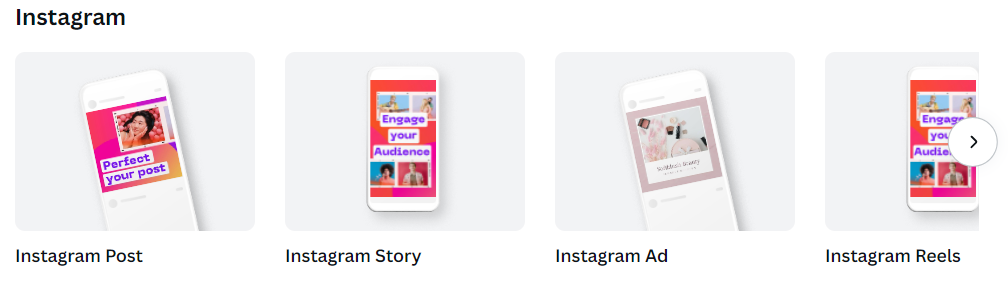
For Instagram, other than regular posts & Ads, you can create stories and reels.
Thumbnails, intro videos, and channel art for YouTube. Twitter Posts and pins for Pinterest.
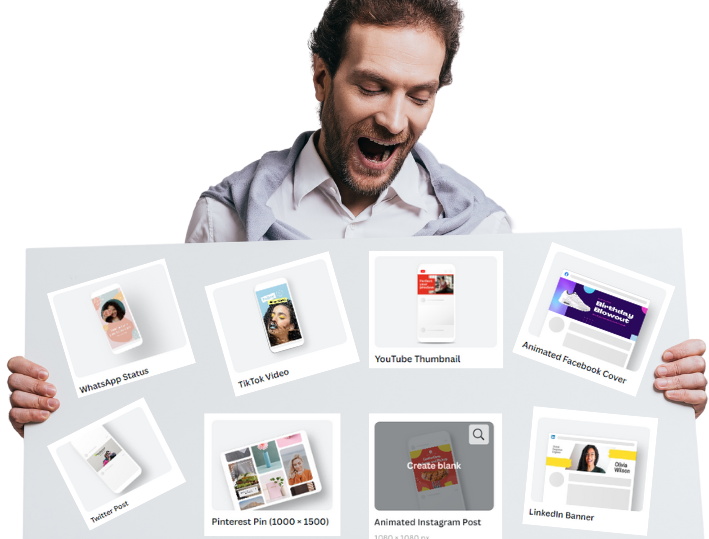
Banners for Linkedin and even Whatsapp status.
And till now we have only discussed things you can design for Social Media.
Disclosure: This post may contain affiliate links that may earn us a small commission on qualified purchases at no added cost to the buyer. Also, please note that we only recommend products that we believe will prove to be of significant value to our readers. Moving forward…Other than blog posts and social media visuals, here are some other cool stuff that you can design with Canva:
Design everything with inbuilt templates; the tool comes packed with more than 50,000 templates in six categories; that you can choose from.
The Six Types of Canva Templates
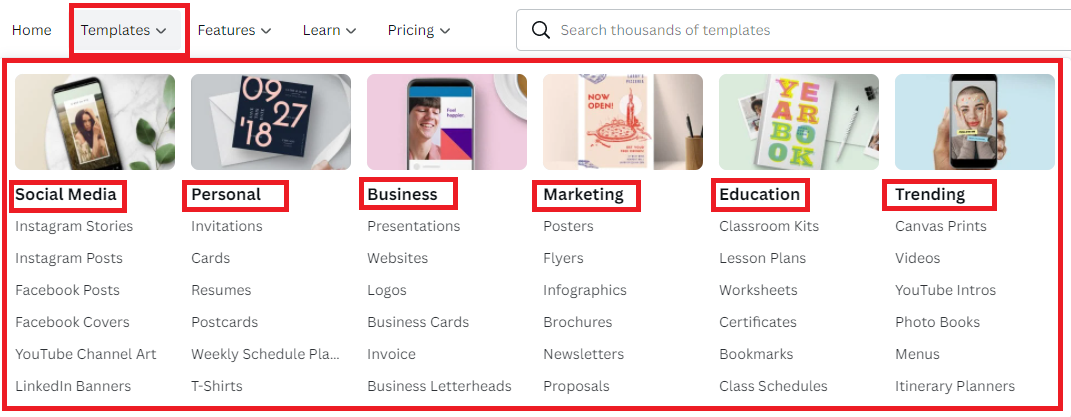
- Social media
- Personal
- Business
- Marketing
- Education
- Trending
Each of these categories has subcategories that help users find them easily.
Some Key Benefits of using Canva’s Inbuilt Templates
Inbuilt Templates Help Save Time and are fun to edit and create recreate brand assets.
Because Each Template Is 100% Customizable for any purpose. You can change colors, add effects, add images, remove background from images, resize images, and add other elements like stock images, graphics, videos, animated gifs, and audios that you can find in Canva’s built-in library; or you can upload your own.
No matter what your industry is; this tool with its professionally designed attractive templates can solve all your visual needs.
Canva Pricing: Is Canva Free?
Canva does have a free version; but unfortunately, the free version has very limited features. It also has a Pro & Enterprise version.
The enterprise version is for 25 users and costs $30 per month per user.
However, to bloggers and entrepreneurs who have small teams along with a regular need for visual content for digital use, then I recommend the Canva Pro version; which I use and have been in love with it since the day I started.
How much is Canva Pro?
Five people can use the Pro version by paying $119.99 for the whole year, which comes to around $10 per month.
Trust me, it is worth every cent; thanks to all the advanced tools, features, and templates that are unlocked once you purchase the pro version; enhancing its functionality and making creating on Canva a lot easier and more fun.
Register Now to USE Canva Pro for FREE.
Canva Basics Tutorial
In this Canva Basics Tutorial, I am going to teach you the basic functionality of this amazing tool.
Even though Canva has templates for everything, I will start with creating a design from scratch so you guys know how it works.
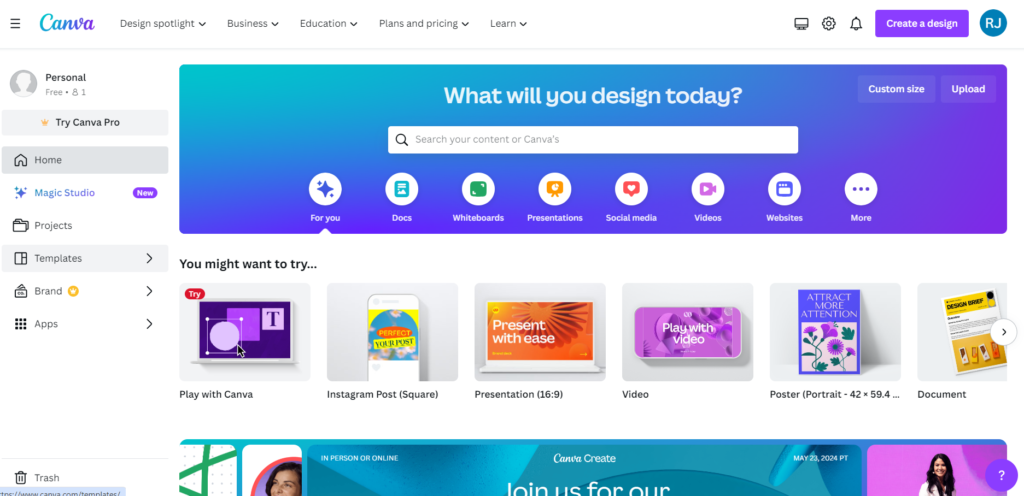
1. ‘Create a design’
Step 1: On the top right side click on the “Create a design” tab to initiate your new design project.
Your click would result in a drop-down list of various suggested templates.
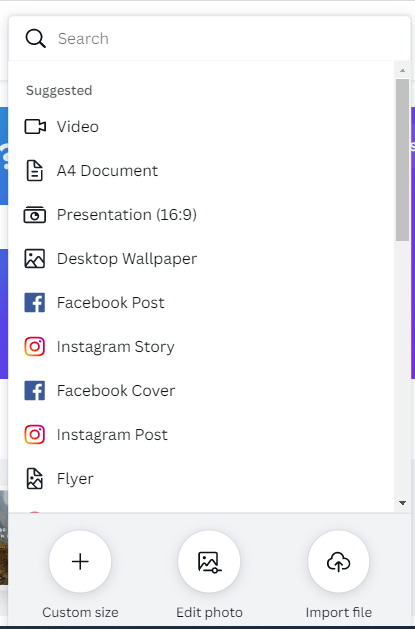
Step 2: Either select a template or click on “Custom Size” to create your own size.
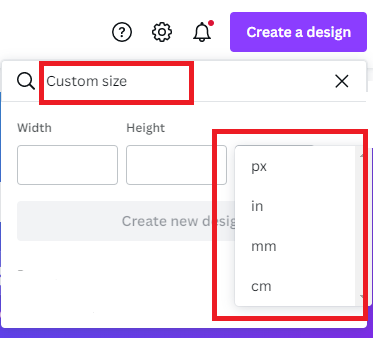
Step 3: Enter your custom dimensions, Width & Height, and then select the unit in pixels, inches, millimeters, centimeters, or inches.
2. Uploading An Image
Canva has its own collection of stock photos but it also allows users to upload images from their computer or Google drive.
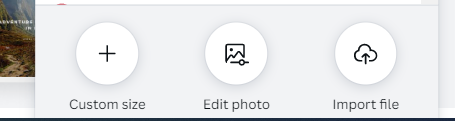
You can do this by either clicking on “Import File”
Or, (as shown above) by dragging the photo file from your drive folder and dropping it on your blank canvas.
3: Basic Photo Editing on Canva
The friendly features of this app really simplify photo editing; making it super easy and fun. The basic features allow you to:
3a) Resize Images
Just click on the image to select it, and take your cursor to one of the four white dots that you see on each corner of the image. Click and hold the mouse right button over the circle and drag to adjust the size and dimensions.
3b) Crop Images
This feature really helps when you want to remove any unwanted outer areas from a photograph or illustrated image. Click on the image to select it and from the pointed corners hold it using the right mouse button and drag to crop out the space you want to be removed.
3c) Flip Your Image
You can flip it vertically to turn it upside down or sideways by flipping it horizontally as shown above.
3d) Animate Your Image With Effects
Make your photograph rise, pan, fade, breath, or pop out of nowhere. Again as you scroll down you will find more effects that you can use to make your photo come to life.
3e) Change Image Positioning
You can move the image within the blank canvas frame with clicks.
3f) Make Your Image Transparent
You can change the image transparency level and decrease it to make your image see-through or invisible.
3g) Balancing Image Effects
You can adjust the brightness, contrast, saturation, and a whole list of attributes that can be increased or decreased to create your own filter that would go best with your image.Or, even better if you…
3h) Applying Inbuilt Filters
In the edit image section just scroll down to locate the inbuilt filters and try them out to see which one goes best with your photograph.
Filters are generally used to either soothe down a high-frequency image or to enhance an image that has low frequency such as. to enhance the edges of an image and make them more prominent.
3i) Insert a Link & Create an Image PDF
Another cool feature Canva has is that it allows you to insert a link within your image; that you can download as a clickable PDF that will advance the user (upon clicking it) to the link you had inserted within.
With this feature, you can create seasonal greeting cards to send via email to your list of customers with your business link. Or to gather reviews as well as to introduce a new product or offer.
4: Advanced Photo Editing on Canva
I call them the “Super Cool Features of Canva”
4a) Remove Image Background
To demonstrate this feature I will use a blank canvas with a white background. So, I pick a photo from the design elements section; drag it, or double click it to have it land on the blank worksheet. Next, with the image selected click on “Edit Image” and then click on “BG Remover” or “Background Remover”. Give it a few seconds and you will see the background vanish.
4b) Change Image Background
The background for your design could be a color (even White) or an image. Remember that different colors convey different messages; as red is known to be associated with physical energy, passion, and desire; orange with activity, and green with nature.
Changing Background Color
Choose a color that goes well with the primary colors of your main image; even better if you can use your brand colors. You can change the background color by first clicking on the background to select it, then on the top left of your design grid, click on the color box to open the color menu on your left. Either choose one of the available colors or add a new color by clicking on the + symbol, which is right under where it says “Document Colors”Choose a color or image that best delivers your brand message.
Changing Background Image
Add a new or different image background, by either selecting one from the Canva “Background” library or uploading your own.
To replace the background with an image click on the image to select it, then in the left-hand sidebar menu click on the “Background” tap (located near the bottom) to access the library and select one that you feel goes best with your main (front) image.
You can also upload your own background design by simply dragging it from your PC folder and dropping it on your design canvas.
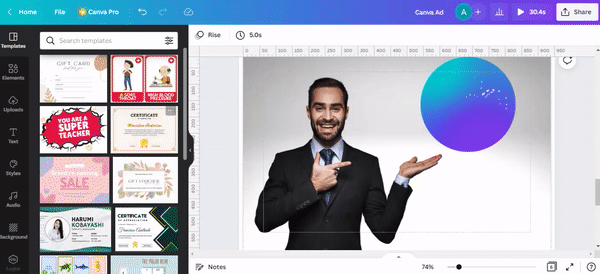
4c) Add Elements
After setting and resizing the main image and the background in place, you can add elements by clicking on the elements tab in the Canva side panel; here you can choose from multiple options falling under graphics, photos, videos, and audio categories.
I used a Canva animated graphic to create a Canva post for affiliate marketing that I am going to use on one of the Blogging Box social platforms.
Always ensure that you place your elements properly in a way that they aren’t too close to each other or to the edges of your design canvas.
4d) Add Copy (Text)
Choosing the Right Fonts
Always choose the right fonts, preferably those you have already used in your logo and the most initial design pieces, such as your visiting card and letterhead if you have one or even those you have used on your website and look good on it.
Being consistent with your font helps your audience recognize and remember you better as unconsciously, they have started associating the fonts you have been using with your brand.
You can upload your fonts to your Canva brand kit. You can watch this video to know how to upload your brand fonts to Canva.
At times, you may need more fonts to use within a design or in a project you are doing for a client. something you could be doing for a client.
Fonts make a big difference to how your design looks at the end. Always go for fonts that look good together and draw attention to your post. For on-screen use, many graphic designers prefer to use a sans serif font; because their sharp edges and clean lines give out more clearly on a screen.
Check out this list of some of the best san serif fonts for 2024 that you can use; as, they are a great choice if you are looking for decent readability, clarity, and results.
Using Font Combinations in Canva
There are too many fonts available and selecting fonts and their sizes to use becomes a pain. Canva has taken care of this problem also; you can use the pre-made combinations to make your work easy.
To find these, combinations click on the “T” (Text) Tab in the left bar and scroll down. You will see all types of font combinations that you can choose from.
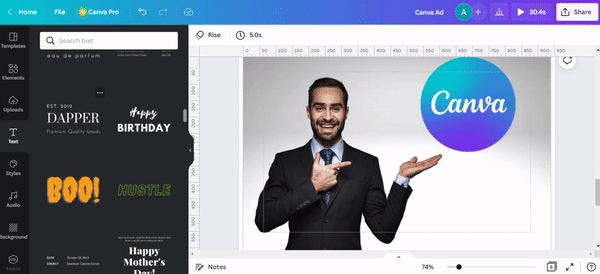
Click on a font combination to add it to your design board. Now edit the text with your own messaging.
Next add some more text, like a heading.

In the same “T” (Text) section scroll back up to the top to find 3 different text sizes; I am going to use the biggest size for my heading, I click on it to bring it on my design board. Next, I will edit the text and type in what I want it to say.
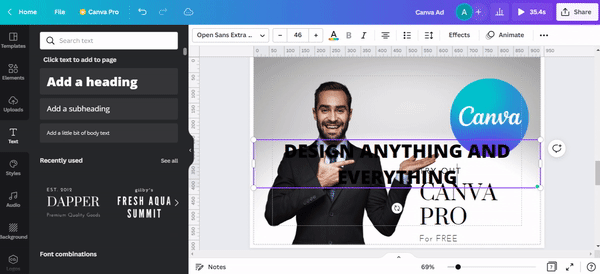
After editing the text I am going to resize it to make it fit in a single line. Next, I will bring it to the center top; where headlines mostly are.
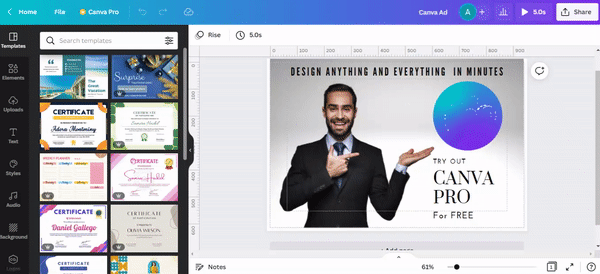
Now it’s time for some tweaking before we can say “Job Done!”

I added the “Wow” factor by just adding in the two words “In Minutes”. Then I selected a font that I use a lot on my website. It is a bit too compact so I added some space between alphabets and decreased the font size to make it fit in one line like a heading.

Lastly, some final adjustments here and there.
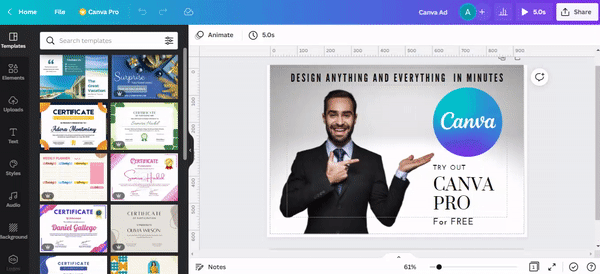
Download or Share on Social Directly!
You can download your designs in different formats which include JPEG, PNG, MP4, and GIF format also.
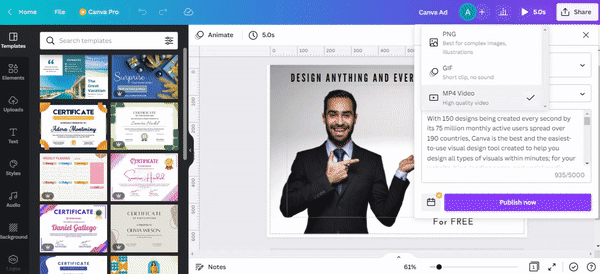
To download click on the “Share” tab in the top left corner. Then scroll down and click on “Download”. Because this design contains an animated graphic element which is the Canva logo it automatically suggests downloading it in the MP4 video format.
Since we have not added any music or sounds to our design we can download it as GIF.
From the dropdown menu select the Gif format and click on download. Within seconds your design will be downloaded and ready to use.
To share the image directly to social media click on the “Share” tab; scroll down and click “Share on social”
I will select Facebook as I am sharing it on the Blogging Box Facebook Page; which I have already connected with Canva. You can see that The Blogging Box Facebook Page is already selected; I only need to fill in the post text which I have already prepared in advance, and now just I am going to copy the text from a Word doc and paste it into the given box.
Next, I will quickly scroll through to see if there is proper spacing in between paragraphs to ensure it looks good and is worth reading.
You can see that the selected format is MP4 which is a video file; however, since my created graphic has no audio I am going to switch the MP4 to GIF format, and click “Publish Now”.Within seconds you will get a notification that your post has been published.
It’s really that simple. Practice makes perfect – the more you use this tool the more familiar you will become and that will cut down the time that you spend on creating your designs on Canva.
Let’s Do This!
An image post like this should not take more than 7 minutes to create and publish. Why not test yourself? Find out how fast you can create a similar post and publish it.
Just register for now to USE Canva Pro for FREE.
Initially, it might take longer, but remember to let us know (in the comments section) once you have beaten the 7-minute mark.
Bottom Line
I hope you guys found this Canva for Beginner’s Guide helpful. I will be writing more tutorials on creating various content types on Canva such as a basic logo, FB Back Cover, FB Posts, Instagram Posts, Pinterest Pins, etc.
Plus my team will also be creating short videos on Canva features and uses; which we will publish on The Blogging Box Youtube Channel. You can subscribe to the channel now and click the bell icon to receive notifications as soon as we start publishing our informative videos.
These videos will demonstrate the different features of Canva and how each feature is used. Plus, we will create video guides where we will show you how you can create different content types (illustrations, infographics, videos) and designs with Canva.
If you own or run a Youtube channel then check our Youtube Thumbnail Canva Guide; which will teach how to quickly create Youtube Thumbnails using Canva templates. and if you ever feel the need to add superscripts to your designs then check out our Superscript in Canva | Quick step-by-step guide; to learn how to easily create superscripts in Canva.
If you have any questions about Canva, its features, or how to create a certain design then please let us know in the comments section below. We will really appreciate it and will answer your concern through our blog or video.
Thank you for reading and have a great day!